Blog· July 1, 2026
1960s Kitchen Remodel: Why Rift Sawn Oak is Your New Best Friend
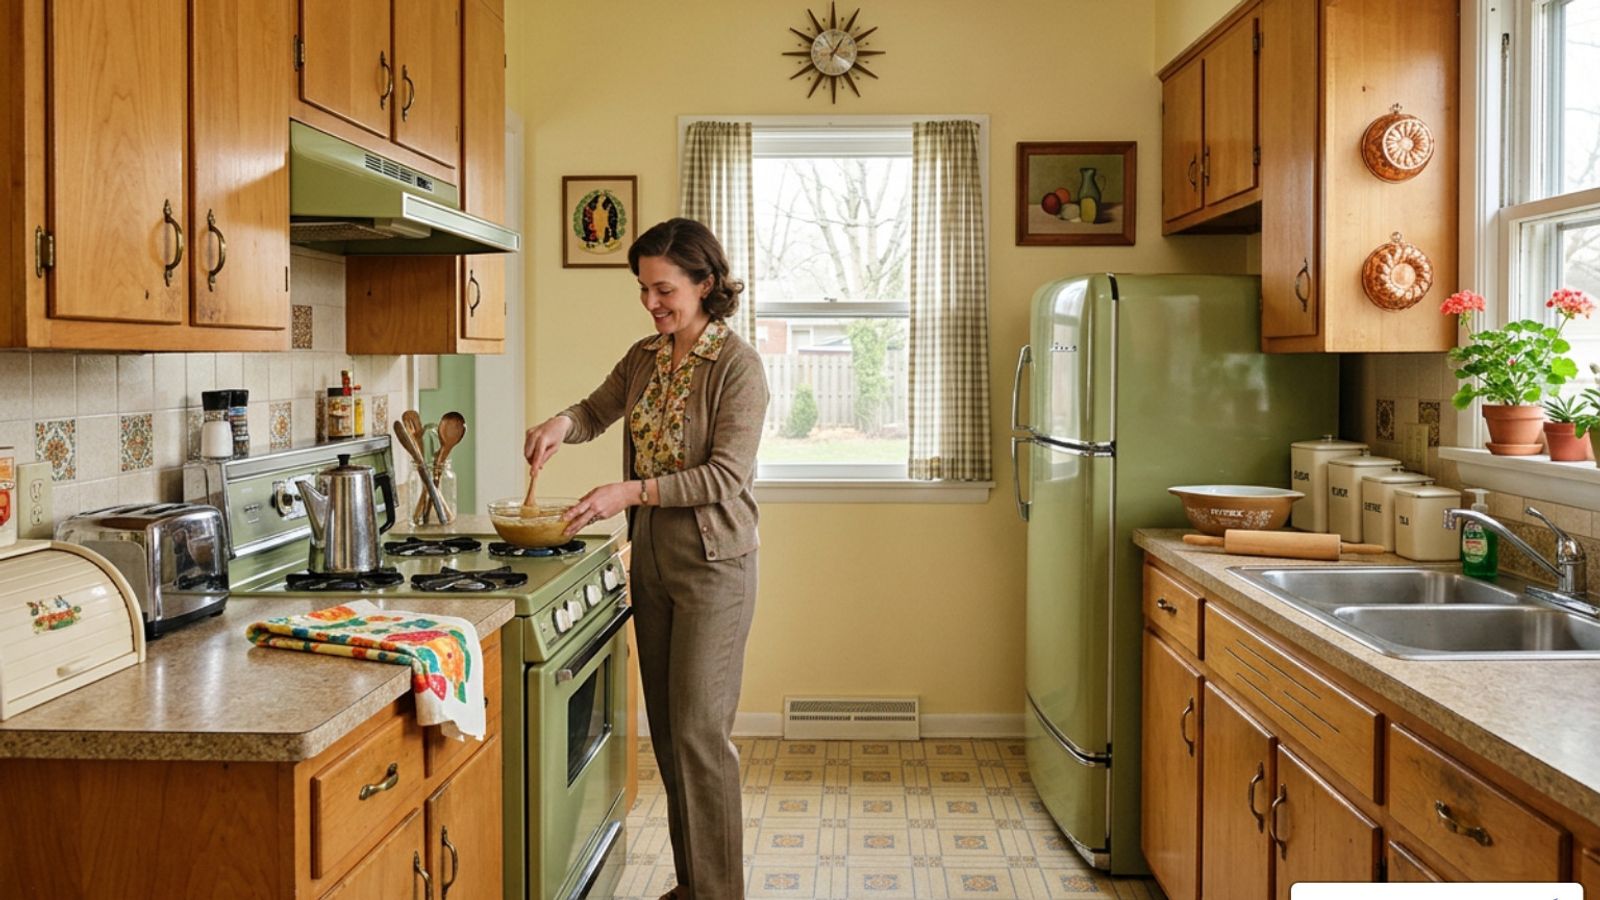
What You Need to Know Before Starting a 1960s Kitchen Remodel
Quick answers for homeowners planning a 1960s kitchen renovation:
Question
Short Answer
How much does it cost?
$5,000–$80,000+ depending on scope
What are the biggest challenges?
Outdated layouts, storage shortages, non-standard appliance sizes
Should you keep original features?
Yes — windows, hardwood floors, and quality tile are worth preserving
Do you need permits?
Yes, for electrical, plumbing, and structural changes
What's the ROI?
70–80% return on investment for full remodels in mid-century homes
A 1960s kitchen remodel is one of the most rewarding — and most complex — home renovation projects you can take on. These kitchens were built for a different era. They were compact (typically 100–150 square feet), closed off from the rest of the home, and designed around appliances and workflows that no longer reflect how families actually live today.
Over 60% of homeowners renovating mid-century homes say the kitchen is their top priority project. And it's easy to see why.
The bones are often beautiful. Solid wood cabinetry, slate floors, original tile, and clean architectural lines give 1960s kitchens a character that newer homes simply can't replicate. But the layouts? The storage? The lighting? Those usually need serious work.
The good news: you don't have to gut everything. The best 1960s kitchen renovations know what to save and what to change — and that balance is exactly what this guide is about.
I'm Henry Rouhana, founder of Sure-Fix Remodeling and a licensed general contractor with over two decades of hands-on experience transforming mid-century homes across the Lehigh Valley. I've led dozens of 1960s kitchen remodel projects, and I know exactly where these renovations go right — and where they go sideways without the right plan. Let's walk through everything you need to know to do this the right way.
The Anatomy of a 1960s Kitchen: Common Challenges and Layout Flaws
To successfully pull off a 1960s kitchen remodel, we first have to understand what we are up against. The 1960s were a fascinating transition period in American residential architecture. The decade began with formal, highly segmented ranch homes and ended with funky, experimental split-levels.
However, almost all kitchens from this era share a few common, frustrating characteristics:
- Outdated, Segmented Layouts: In the 1960s, the kitchen was still treated as a utility room. It was meant to contain smells, messes, and noise. Consequently, they are almost always isolated from the dining and living spaces by heavy partition walls.
- Severe Storage Shortages: Upper cabinets from this era are typically only 12 inches deep, compared to modern 12-to-15-inch standards. This means standard dinner plates and modern small appliances often won't fit inside them. Furthermore, corner cabinets were rarely optimized, resulting in "dead zones" where plastic containers went to die.
- Non-Standard Appliance Sizes: If you try to slide a standard 36-inch French door refrigerator into a 1960s kitchen alcove, you are in for a rude awakening. Most homes from this era were built to accommodate 33-inch-wide (or even smaller) refrigerators. The same goes for wall ovens and cooktops, which were often built directly into masonry or tight wood surrounds.
- Hidden Structural Surprises: Whether your home is in Easton, PA, or Phillipsburg, NJ, opening up walls in a sixty-year-old house is bound to reveal some history. It is highly common to find outdated knob-and-tube or early romex wiring, unvented plumbing lines, or even structural termite damage hidden behind the plaster and drywall.
To help put this into perspective, let's look at how kitchen standards have changed over the last sixty years:
Feature
1960s Kitchen Standard
Modern 2026 Kitchen Standard
Average Footprint
100–150 square feet; closed-off box
200–300+ square feet; open-concept flow
Upper Cabinet Depth
12 inches (hard to fit large dinner plates)
13–15 inches (ample room for plates/appliances)
Standard Fridge Width
30 to 33 inches
36 inches (standard/counter-depth)
Lower Cabinet Storage
Fixed shelves (requires kneeling to reach back)
Deep drawer systems and pull-out organizers
Lighting Design
One central fluorescent fixture or globe light
Layered LED lighting (can lights, under-cabinet, pendants)
Flooring Materials
Sheet vinyl, linoleum, or thin wood veneer
Engineered hardwood, natural stone, or luxury tile
Structural and Layout Solutions for a 1960s Kitchen Remodel
If you want your kitchen to function beautifully in 2026, you cannot rely on a 1960s layout. The most effective way to improve flow is to open up the space.
Removing non-load-bearing walls is a fantastic, relatively low-cost way to merge your kitchen with an adjacent dining room or living area. Doing this can instantly triple your usable counter space and increase your storage capacity by up to 60% by allowing for a spacious central island.
But what if the wall you want to remove is load-bearing?
Removing a load-bearing wall requires installing a structural beam (often a heavy engineered lumber or steel beam) to support the weight of the floor or roof above. While this adds to the structural budget, the transformation is almost always worth it.
If a full wall removal is out of your budget, a highly effective alternative is cutting a large pass-through window into the wall. This connects the spaces visually, lets in natural light, and allows you to add a bar counter with stool seating on the other side.
When rearranging your layout, we always focus on workflow optimization. This means perfecting the "work triangle" (the path between your sink, stove, and refrigerator) and integrating modern storage solutions like:
- Floor-to-ceiling pantry cabinets to add 20–30% more storage space.
- Deep drawer systems in place of lower cabinets, allowing you to easily access heavy pots and pans without bending down.
- Lazy Susans, blind-corner pull-outs, or "magic corners" to reclaim lost corner space.
- Dedicated appliance garages to keep your countertops free of clutter.
If you are trying to figure out how to maximize your specific footprint, our team can help you map out the perfect flow. Take a look at More info about our interior design services to see how we blend structure and style to solve these layout puzzles.
Preserving Mid-Century Charm: What to Keep vs. What to Replace
A successful 1960s kitchen remodel isn't about erasing history; it's about honoring it. If you strip out every single vintage detail, you risk losing the soul of your mid-century modern home. The secret is knowing what to preserve and what to replace.
What to Keep (If in Good Condition)
- Original Wood Windows: If your kitchen features large, wood-framed awning or picture windows that look out into your backyard, do everything you can to keep them. They flood the space with natural light and anchor the indoor-outdoor connection that defines mid-century design.
- Built-In Breakfast Nooks: Cozy built-in booths or bench seating are incredibly charming and highly functional for busy families.
- Copper or Brass Range Hoods: Original copper hoods are architectural masterpieces. If you have one, clean it up, polish it, and let it serve as the dramatic focal point of your new kitchen.
- Quality Flooring: Original slate tile or solid hardwood floors are incredibly durable and packed with character. If they are slightly damaged, we can often source salvaged matching materials to patch transitions seamlessly.
What to Replace
- Worn-Out Laminate Countertops: While colorful Formica was a staple of the '60s, decades of knife nicks and water exposure usually mean it's time for them to go.
- Dingy, Low-Hanging Ceiling Cabinets: In many '60s homes, upper cabinets were suspended from the ceiling to separate the kitchen from the dining area. This blocks sightlines and makes both rooms feel tiny.
- Inadequate Lighting: Say goodbye to humdrum central fluorescent tubes and hello to warm, layered light.
Why Rift Sawn Oak is the Ultimate Material for Your 1960s Kitchen Remodel
If you want to capture the authentic, warm, minimalist aesthetic of the mid-century modern era while ensuring your kitchen feels fresh and high-end, there is one material that stands head and shoulders above the rest: rift sawn oak.
During the 1960s, designers fell in love with natural wood veneers. They wanted materials that celebrated organic beauty without the heavy, ornate details of traditional cabinetry. This led to the rise of flat-panel "slab" cabinet doors with full overlay profiles, which completely concealed the cabinet face frames behind them.
Rift sawn oak is the absolute perfect choice for recreating this look today.
Unlike plain sawn oak, which features a wavy, cathedral-like grain pattern, rift sawn oak is milled at a specific angle that produces an incredibly straight, linear grain. This linear pattern emphasizes vertical or horizontal lines, creating a sense of height, continuity, and architectural calm. It is clean, refined, and entirely devoid of unnecessary ornamentation.
When paired with simple, streamlined hardware, rift sawn oak cabinets let the natural warmth of the wood do the talking. It also pairs beautifully with both light, airy palettes and moody, darker design schemes.
For a look at how a moody, wood-forward aesthetic can completely transform a space, check out the design inspiration in A Mid-century Kitchen Gets a Modern (and Moody) Makeover | Architectural Digest.
Real-World Transformations: Before-and-After Case Studies
Seeing is believing when it comes to the power of a 1960s kitchen remodel. Let’s look at two incredible real-world examples of how homeowners have successfully modernized their spaces while honoring their mid-century roots.
Case Study 1: The Power of Earthy Greens and Natural Light
In this stunning transformation, the homeowners faced a dark, cramped 1965 kitchen dominated by orange wood paneling and a complete lack of natural light. Because a full load-bearing wall removal was out of their budget, they got creative. They cut a large DIY pass-through window into the wall for a fraction of the cost, immediately connecting the kitchen to the living area and flooding the space with light.
Instead of tearing out their solid cabinet boxes, they saved thousands of dollars by refacing them. They chose a gorgeous, earthy green paint for the cabinets, paired with clean white countertops and simple wood flooring that added mid-century warmth.
You can view the full visual journey and design details of this project here: 1960s Kitchen Redo with Green Cabinets: Before & After Photos | The Kitchn.
Case Study 2: Sourcing and Restoring Original Steel Cabinets
For some homeowners, authenticity is everything. In this unique five-year DIY journey, a homeowner set out to restore a dilapidated mid-century kitchen using original 1960 Geneva steel cabinets. These iconic cabinets — known for their rounded corners, glass-front "cabinettes," and incredible durability — were sourced from Craigslist and salvage yards across seven different cities.
The homeowner paired these beautifully restored pastel cabinets with a custom-built mosaic tile backsplash featuring an authentic "scatter pattern" and vintage-patterned Formica countertops.
Read the incredible story of this labor of love here: See How Colorful 1960s Cabinets Revive a “Falling Apart” Kitchen.
Modernizing Finishes: Cabinets, Countertops, Backsplashes, and Lighting
When updating a 1960s kitchen, your material choices will make or break the design. The goal is to select modern, high-performance materials that pay homage to the textures and colors of the mid-century era.
- Countertops: While original 1960s kitchens relied heavily on laminate, modern homeowners prefer durability. Engineered quartz in a solid white or subtle terrazzo-style pattern is the perfect solution. It gives you the clean, bright look of the era without the maintenance of marble or the fragility of old laminate.
- Backsplashes: This is your chance to have some fun! Hexagonal tiles, stacked linear subway tiles, or mosaic tiles in a custom scatter pattern are incredibly period-appropriate. They add texture and visual interest without overwhelming the eyes.
- Lighting: Lighting is the jewelry of the kitchen. Replace your old fixtures with iconic mid-century statement pieces. A brass Sputnik chandelier over a dining nook or sleek globe pendants over a new kitchen island will instantly anchor the room's aesthetic. Add under-cabinet LED strip lights to provide essential task lighting for cooking.
Budget-Friendly Strategies for Updating 1960s Kitchen Cabinets
Let's face it: a full kitchen gut-remodel isn't always in the cards. If your budget is tight, you can still achieve a jaw-dropping transformation by working with your existing cabinetry. 1960s cabinets were often built on-site using incredibly sturdy plywood or solid wood frames. If those frames are structurally sound, you have some fantastic, cost-effective options:
Sanding and Painting: A fresh coat of paint can perform miracles. If you have dated, dark brown cabinets, sanding them down and applying a warm, creamy beige, soft sage green, or deep navy can instantly modernize the space.
Cabinet Refacing: If you like your kitchen's layout but hate your cabinet doors, refacing is your best friend. We keep your existing cabinet boxes intact and simply install brand-new, modern slab or shaker-style doors and drawer fronts. This gives you the look of a brand-new kitchen for 30–50% less than the cost of custom cabinetry.
Floating Shelves: To make a small, narrow kitchen feel twice as large, try removing a few bulky upper cabinets and replacing them with thick, floating wood shelves. This creates an open, airy feel and gives you a beautiful place to display your favorite dishes.
To see just how much you can achieve without a full demolition, take a look at this inspiring project: This 1960s Kitchen’s No-Demo Reno Is Completely Stunning (No More Brown Cabinets!).
Planning Your 1960s Kitchen Remodel: Costs, Timelines, and Local Regulations
A successful remodel requires careful planning, a realistic budget, and a clear understanding of the rules in your local area. Whether you live in a historic home in Bethlehem, PA, a cozy ranch in Coopersburg, or a mid-century split-level in Hackettstown, NJ, navigating local building codes is a crucial step.
At Sure-Fix Remodeling, we specialize in making this process seamless. We are a full-service design-build firm, which means we handle everything from the initial architectural sketches and material selections in our private showroom to pulling permits and completing the physical construction. We also specialize in aging-in-place upgrades, ensuring your new kitchen is as safe and accessible as it is beautiful.
To learn more about how we work, check out More info about our home remodeling services.
Typical Costs Associated with a Mid-Century Renovation
What should you realistically expect to spend on a 1960s kitchen remodel? While every home is unique, most mid-century kitchen renovations fall into one of three budget tiers:
- The Budget-Friendly Refresh ($10,000 – $20,000): This tier focuses on cosmetic updates within your kitchen's existing footprint. It typically includes professional cabinet painting or refacing, new laminate or entry-level quartz countertops, a new sink and faucet, updated lighting fixtures, and fresh paint.
- The Mid-Range Renovation ($25,000 – $55,000): This is the sweet spot for most homeowners in our area. It includes brand-new semi-custom cabinets (like beautiful rift sawn oak slab doors), premium quartz countertops, a new tile backsplash, updated energy-efficient appliances, improved lighting layouts, and minor plumbing or electrical modifications.
- The Full-Scale Transformation ($60,000 – $90,000+): This tier is for homeowners looking to completely reimagine their space. It involves removing structural walls, rerouting plumbing and electrical lines, installing custom cabinetry, integrated high-end appliances, custom lighting designs, premium flooring, and personalized aging-in-place features.
The Return on Investment (ROI): Investing in your kitchen is one of the smartest financial decisions you can make for your home. Kitchens in 1960s ranch and split-level homes typically see a 70% to 80% return on investment upon resale, making it a highly lucrative upgrade.
Frequently Asked Questions About Mid-Century Kitchen Renovations
Is it worth remodeling a 1960s kitchen or should I just move?
Remodeling is almost always more cost-effective than moving in today's competitive real estate market. When you factor in realtor fees (usually 5–6% of your home's value), closing costs, packing, and moving expenses, you can easily spend tens of thousands of dollars before you even buy a new home. Spending that same money on a beautiful, custom kitchen remodel allows you to stay in the neighborhood you love while building direct equity in your home.
Can I remodel a 1960s kitchen without removing walls?
Absolutely! While an open-concept layout is highly popular, you can create a highly functional, breathtaking kitchen within your existing footprint. By focusing on smart, modern cabinet storage systems (like deep drawers and pull-out pantries), counter-depth appliances, and lighter, brighter color palettes, we can make even the smallest 1960s kitchen feel spacious and efficient.
What permits do I need for a kitchen remodel in PA or NJ?
If you are doing a simple cosmetic refresh (like painting cabinets or swapping countertops in the exact same location), you generally do not need a permit.
However, if you are making structural changes (like removing a wall), moving plumbing lines, adding new electrical outlets, or updating your HVAC system, you will absolutely need permits. Building departments in Easton, Allentown, Bethlehem, and Phillipsburg require strict adherence to local building codes to ensure your home remains safe and up to standard. When you work with us, we handle the entire permitting process for you from start to finish.
Conclusion
A 1960s kitchen remodel is your opportunity to blend the very best of mid-century design with the comfort, flow, and performance of modern technology. By preserving the soul of your home — whether through iconic design choices, gorgeous finishes, or the straight-line elegance of rift sawn oak — you can create a warm, inviting space that your family will cherish for decades to come.
At Sure-Fix Remodeling, we don't believe in cookie-cutter solutions. Our unique in-house showroom and design partnership allow us to offer a truly premium, full-service remodeling experience without the massive overhead of big-city firms. From our first design consultation to the final sweep of the broom, we are with you every single step of the way.
Ready to bring your mid-century dream kitchen to life? Schedule a Kitchen Remodeling Consultation with our team today, and let's start planning your transformation!