Blog· September 1, 2026
How to Install a Stair Carpet Runner in 5 Simple Steps
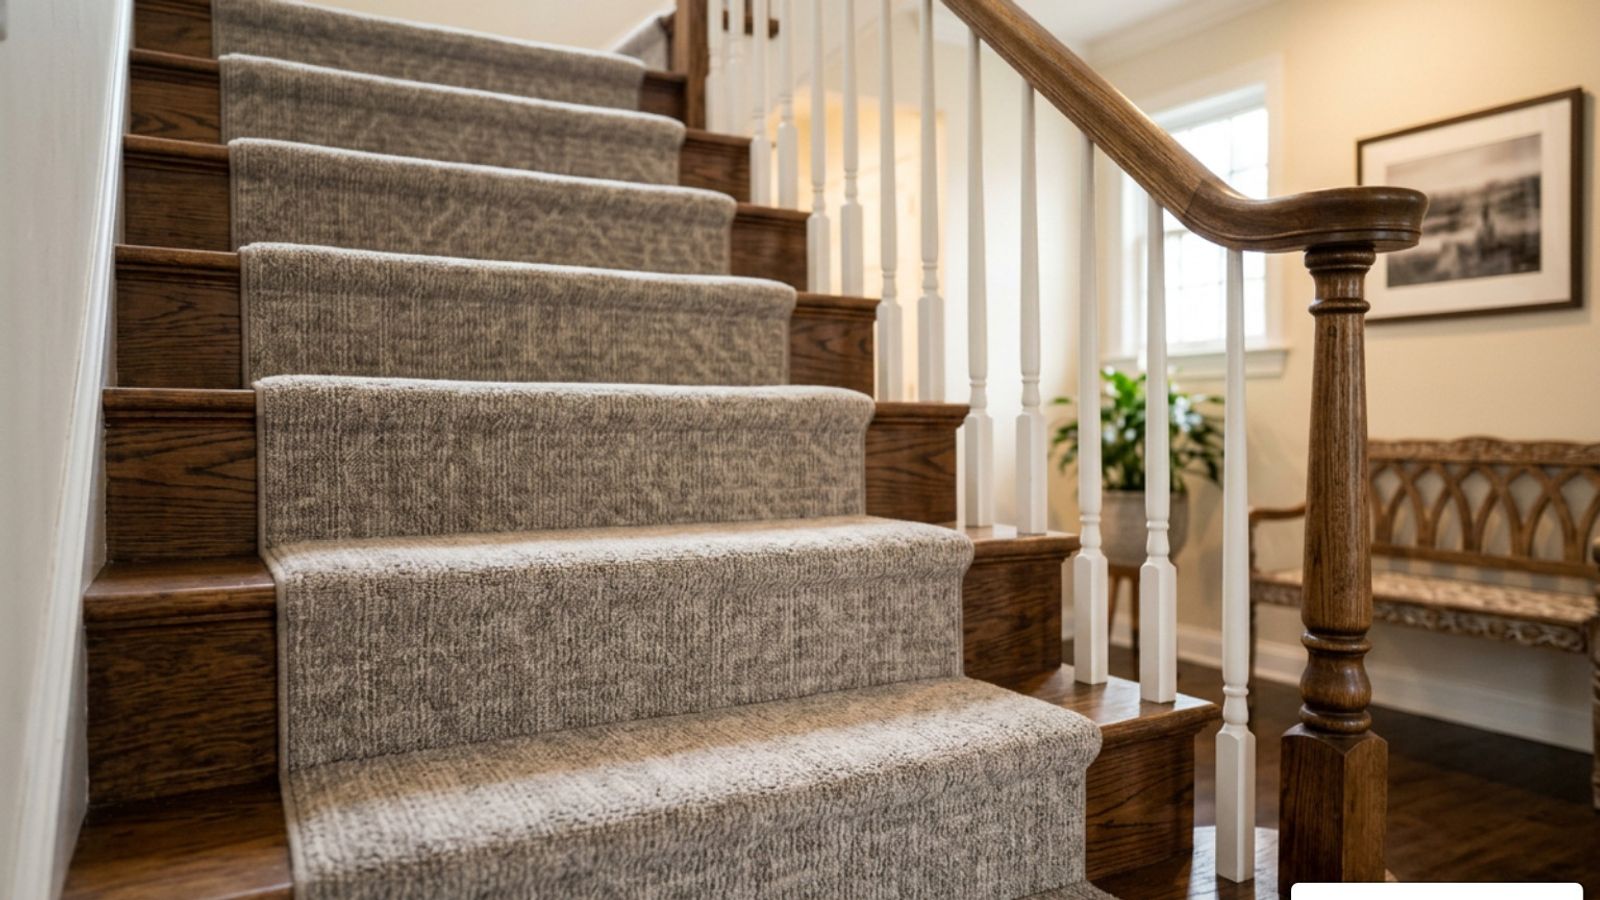
Why Add a Stair Runner: Safety, Acoustic Comfort, and Design
Installing a stair carpet runner involves five straightforward steps: measuring your stairs and calculating length with a 10% to 15% safety buffer, prepping the wood treads and marking center alignment guidelines, securing dense underlayment padding, tensioning and stapling the runner securely with a knee kicker, and cleanly finishing seams and thresholds.
Staircases are naturally among the highest-traffic zones in any home, yet bare hardwood, painted pine, or polished stone treads can create significant slip hazards and echo footsteps throughout the house. Integrating a dedicated runner protects the underlying timber from scratches, dings, and daily abrasions while establishing a welcoming design focal point. Whether tackling a single straight flight or completing a broader flooring installation upgrade across your living spaces, adding carpet to steps brings warmth, traction, and stability to the entire household.
Key Benefits of Installing Stair Carpet Runner in Modern Homes
When evaluating functional upgrades for a multi-story layout, a stair runner delivers immediate practical improvements:
- Slip-Resistant Traction: Bare wood coated with polyurethane can become dangerously slick, especially when wearing socks. Carpet fibers create essential friction to prevent slips and falls for young children, active pets, and aging adults.
- Acoustic Dampening: High-density carpet paired with an appropriate underlayment absorbs impact energy, eliminating the hollow stomping sounds common to open-concept foyers.
- Wood Preservation: Heavy foot traffic concentrated on the center of stair treads eventually strips away polyurethane, paint, and wood stain. A runner takes the brunt of this daily friction.
- Sunlight Protection: While uncovered wood naturally patinas and fades over time under UV exposure, runners shield the high-impact center zone of treads from direct sun bleaching.
Selecting Durable Materials: Wool, Synthetic Sisal, and Flatweaves
Carpet on stairs experiences intense downward and lateral shear forces every time someone steps up or down. Selecting the right fiber profile and construction determines how well your installation will hold its shape over years of use:
- 100% Wool and Wool Blends: Wool remains the gold standard for staircases due to its natural crimp, exceptional fiber resilience, and inherent stain resistance. It bends smoothly over nosings without exposing the backing weave (grinning).
- Synthetic Sisal (Recycled Nylon / Polypropylene): While natural plant fibers like raw jute or seagrass can be slippery underfoot, stiff, and prone to liquid staining, modern synthetic sisal woven from performance nylon provides the crisp textural look of natural woven grass with superior stain resistance and barefoot comfort.
- Dense Low-Pile Flatweaves: Tight, dense flatweaves resist stretching out of shape. Avoid loose, stretchy cotton weaves on stairs, as repeated forward stepping pressure can pull stripes and geometric patterns out of square.
The Complete Guide to Installing Stair Carpet Runner in 5 Steps
Before beginning, gather all the specialized tools required for a professional-grade finish. Essential equipment includes a narrow-crown pneumatic or electric stapler, a bolster chisel (carpet tucker), a heavy-duty knee kicker, an accurate tape measure, a framing square, heavy-duty carpet shears, and double-sided carpet tape.
Reviewing a reliable technical resource like the This Old House guide on stair runner installation will also help familiarize you with trade terminology before setting up your workspace.
Step 1: Accurate Measuring and Ordering Calculations
Accurate calculations prevent the frustration of running short on material midway up a flight.
Measure the tread depth (run) from the back crotch to the front edge.
Measure the riser height (rise) from the bottom tread surface to the top of the next tread.
Measure the bullnose depth (the curved lip extending past the riser).
For standard residential stairs with nosing, a reliable rule of thumb is to allow 19 inches of runner length per step, adding half a step allowance for the final top riser. Multiply this total length by your stair count, then add a 10% to 15% safety buffer for trimming, pattern matching, and waste.
Standard off-the-shelf runner widths typically measure 27 inches, 30 inches, or 32 inches. For standard 36-inch to 40-inch wide staircases, a 27-inch or 30-inch runner leaves a visually balanced 3- to 4-inch reveal of exposed hardwood on each side.
Step 2: Essential Preparation and Alignment Marking
Preparation ensures straight lines and durable adhesion:
- Remove all old staples, tack strips, and adhesive residue using joint pliers and a flathead screwdriver.
- Patch any gouges in the wood with wood putty, sand rough spots smooth, and ensure any paint or finish is fully cured.
- Locate the exact center of each tread and riser using your tape measure and mark it lightly with a pencil.
- Measure outward from the center mark to establish your boundary lines.
- The Spacer Block Trick: Cut a scrap block of wood to the exact width of your desired side margin (for example, 4.5 inches). Placing this block against the stair stringer or skirtboard on every single step gives you an instant physical guide to keep your runner perfectly straight from bottom to top without continuous measuring.
- Run blue painter's tape along the tread margins as an easy visual alignment track.
Step 3: Securing Underlayment and Tread Padding
Carpet padding prevents runner shifting, cushions footsteps, and protects the underlying wood. Choose a dense 1/8-inch to 1/4-inch rubber-and-felt pad.
Cut individual pad pieces 1 inch narrower on each side than your runner width (for instance, a 25-inch pad for a 27-inch runner). This 1-inch offset leaves clear space for stapling the carpet edges flush to the wood without bulky pad ridges showing through.
Cut the pad length so it covers the flat tread surface from the back crotch to the beginning of the bullnose curve.
For waterfall installations, clip the two front corners of the pad at a 45-degree angle so padding stays hidden under the draped fabric.
Secure the pad to the center of each tread using two strips of double-sided carpet tape and a few staples driven along the perimeter with a hand or hammer tacker. Understanding how to attach carpet runner to stairs properly at the underlayment stage prevents bunching underfoot later.
Step 4: Fastening and Tensioning the Runner Carpet
Work methodically up the stairs to maintain consistent tension:
Square and Anchor the Base: Align your runner at the bottom riser. Fold the raw bottom edge under by 1 to 2 inches to create a clean hem, center it along your reference marks, and drive 9/16-inch narrow-crown staples across the base fold every 3 inches.
Tension with a Knee Kicker: Pull the runner upward over the first tread. Position your knee kicker in the center of the tread, apply gentle body pressure forward to eliminate slack, and lock the carpet into place.
Crease the Crotch: Use a heavy bolster chisel or stair tool to firmly wedge and crease the carpet deep into the 90-degree angle where the tread meets the riser.
Fasten the Crease: With the carpet held tightly into the seam, shoot staples every 3 inches directly into the crotch, working from the center outward to the left and right. Part the carpet pile with your fingers before firing so the staple crown sinks directly into the backing, remaining hidden from view.
Pre-Bend Stiff Backings: When wrapping around the tread bullnose, use your stair tool to pre-crease and score stiff carpet backings under the nosing before driving staples upward into the wood every 1 to 2 inches.
Step 5: Seamless Splicing and Bottom Riser Finishing
Most staircases require joining multiple runner lengths together.
- Where to Join: Always place seams hidden underneath the tread nosing or directly inside the tread-riser crotch—never across the flat, high-impact surface of a tread.
- Making the Joint: Apply heavy-duty double-sided seam tape to the back of the runner before cutting across woven fibers to prevent unravelling. Overlap the fresh factory edge of the new roll directly over the cut end under the bullnose, aligning pattern repeats carefully, and staple firmly through both layers.
- Finishing the Top: Run the carpet up the final riser, trim away the excess with a carpet knife, fold the edge cleanly underneath, and staple directly beneath the landing nosing or transition threshold moulding.
- Optional Stair Rods: If adding decorative brass or iron stair rods, pre-drill pilot holes in the tread-riser corners and secure the finial brackets over the runner for an elevated, traditional look.
Waterfall vs. Hollywood Cap-and-Band Installation Methods
The two primary techniques for fitting runners to stairs are the Waterfall and Hollywood (cap-and-band) methods. The best choice depends on your staircase profile, carpet flexibility, and personal design preference.
Feature / Consideration
Waterfall Method
Hollywood (Cap-and-Band) Method
Visual Appearance
Cascading, relaxed, modern
Tailored, architectural, traditional
Installation Profile
Drapes directly from nose to crotch
Hugs and wraps tightly under nose to riser
DIY Difficulty
Beginner to Intermediate
Intermediate to Advanced
Material Requirement
Standard (approx. 19" per step)
Requires 1–2 extra inches per step
Tension Retention
Moderate
High (pinned at both nose and crotch)
Best Carpet Types
Heavy/stiff backings, bold patterns
Flexible backings, low-pile, solids
Waterfall Method Mechanics
In a waterfall installation, the carpet drops straight down from the nosing of one tread to the back corner of the tread below without being fastened flat against the vertical riser face.
This approach creates a clean, cascading line that works exceptionally well with heavy, stiff carpet backings or thick looped wools that resist sharp 90-degree bends. It requires fewer fasteners and avoids distortion across vertical stripe patterns.
Hollywood Upholstered Technique
The Hollywood or cap-and-band method contours tightly around the stair nosing, tucks underneath the lip, and fastens flush against the vertical riser before continuing down to the next tread.
This method delivers a tailored, custom-upholstered look that highlights the architectural profile of bullnose stairs. For a visual deep-dive on tacking tight contours, check out this detailed runner installation tutorial for practical styling insights.
Advanced Solutions for Winders, Quarter-Turn Landings, and Varying Widths
While straight staircases follow a predictable rhythm, historic homes across Pennsylvania and New Jersey often feature complex layouts, including quarter-turn landings, pie-shaped winder steps, and staircases that taper in width.
Pro Techniques for Installing Stair Carpet Runner Around Landings
- Handling 90-Degree Landings Without Complex Miters: Rather than attempting difficult 45-degree diagonal miter cuts on patterned rugs, treat intermediate landings as independent sections. Run the bottom flight up to the landing riser, finish the edge, and start a fresh cut piece turned 90 degrees on the landing platform. Split the carpet pile along the seam to hide fasteners completely.
- Pie-Shaped Winder Steps: Winding stairs require custom angular adjustments on every tread. Tension the carpet tightly along the wider outer edge while creating discreet, folded pleats along the narrow inside pivot point, pinning each fold securely beneath the nosing.
- Staircases with Differing Widths: If your staircase widens at the bottom, combine standard pre-bound runners for the straight upper flights with a larger area rug of matching material cut down and custom-bound by a fabricator to fit the wider lower treads.
Frequently Asked Questions About Stair Carpet Runners
Can I install a stair runner using only double-sided carpet tape?
No. While double-sided carpet tape is excellent for temporarily positioning underlayment pads, it should never be used as the sole fastening method for a stair runner. Foot traffic exerts intense horizontal shear force on stair treads that quickly breaks down tape adhesives, leading to dangerous ripples and slipping hazards. Heavy-duty mechanical fasteners—such as 9/16-inch narrow-crown staples driven into solid wood—are essential for long-term safety.
How do I hide staple crowns in loop or low-pile runners?
To keep fasteners invisible, use a pneumatic or electric stapler equipped with 18-gauge narrow-crown staples rather than a wide manual hand stapler. Before pulling the trigger, push the pointed nose of the stapler deep between the yarn fibers so the crown seats directly against the woven backing. If any staple heads remain visible or cause slight dimpling, gently tap them flush with a small rubber mallet and brush the pile over the crown with your fingers.
Will staples or tackless strips permanently damage hardwood treads?
Fastening a runner does create tiny micro-puncture holes in the wood, but these are small and easily repaired with color-matched wood putty or filler during future refinishing. In fact, a runner prevents far more extensive wear by protecting hardwood treads from gouges, finish erosion, and heavy foot traffic across the main walking path.
Conclusion
Installing a stair runner brings together safety, comfort, and refined craftsmanship in a single weekend project. By measuring carefully, securing the proper underlayment, maintaining uniform tension, and choosing the right fastening style, you can transform a plain staircase into a durable, quiet focal point that enhances your entire home.
If your staircase features complex winders, custom landings, or requires structural tread repairs, our team at Sure-Fix Remodeling is here to help. Explore our specialized carpet runner installation solutions or visit our regional showroom to review durable materials, custom binding options, and full-service renovation support tailored to your home.