Blog· August 12, 2026
The Complete Guide to Comparing Bathroom Lighting Fixture Options
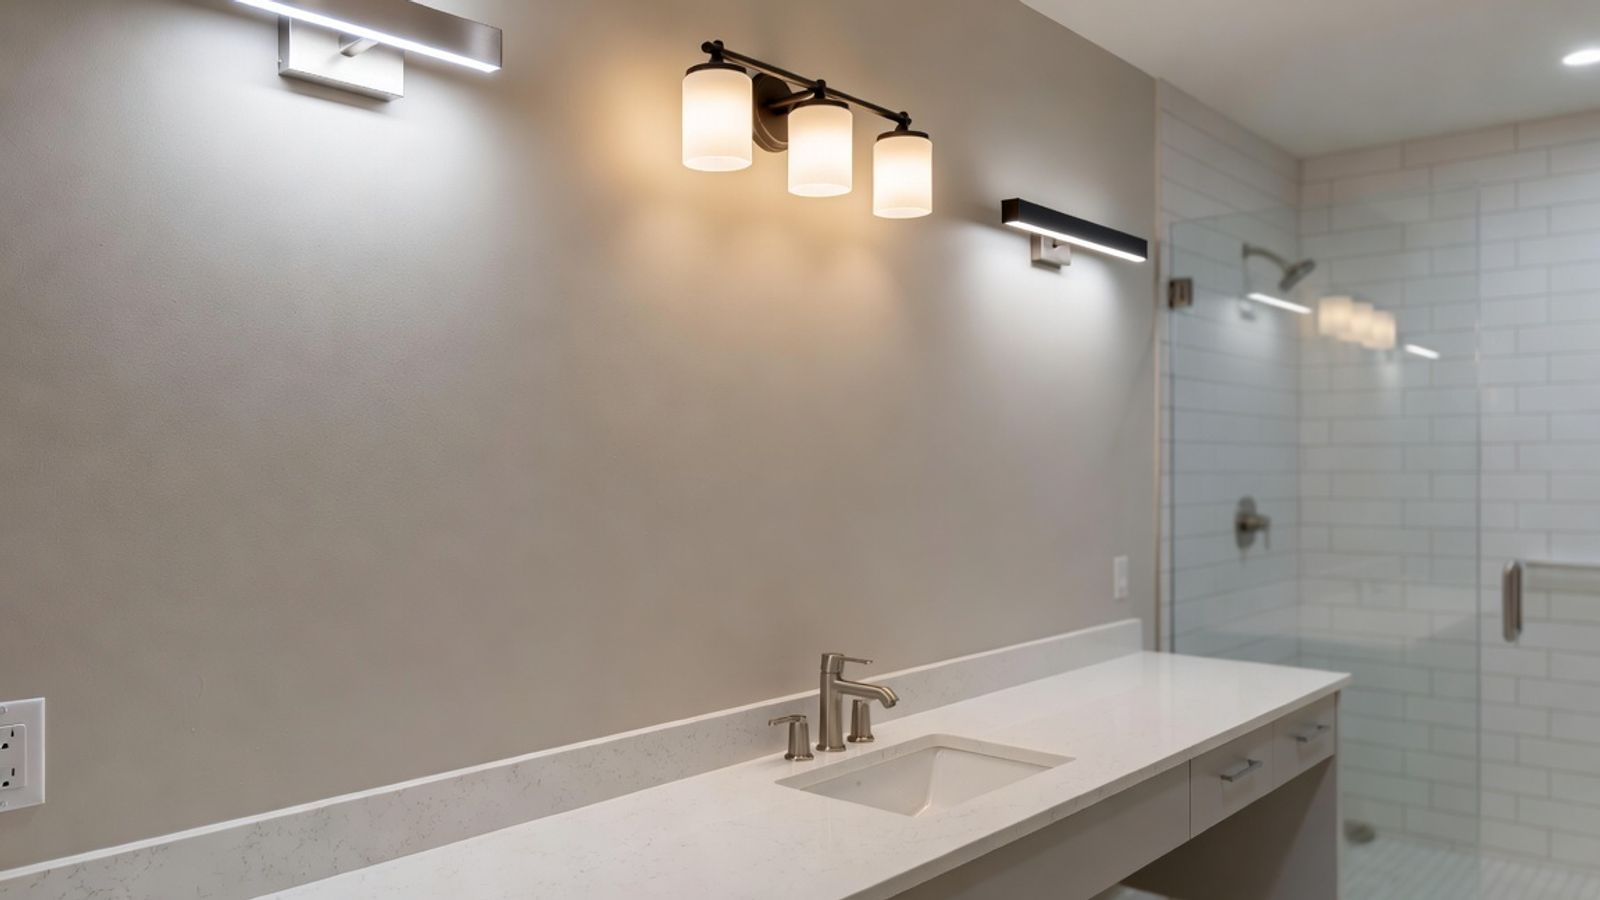
When planning a bathroom lighting fixture upgrade, selecting the right style, finish, and configuration requires balancing functional brightness with visual harmony. Bathrooms are high-humidity, high-use spaces, making material durability just as important as appearance.
Vanity Width
Recommended Fixture Width
Typical Socket Count
Best Used For
Under 25 in.
12 to 18 in.
1 to 2 lights (or side sconces)
Powder rooms, small single vanities
25 to 30 in.
18 to 24 in.
2 to 3 lights
Standard guest bathrooms, small master vanities
31 to 36 in.
24 to 30 in.
3 to 4 lights
Standard single-sink master vanities
37 to 42 in.
30 to 36 in.
4 lights
Wide single vanities
43 in. and larger
36 to 48 in. (or dual fixtures)
4 to 6 lights
Large single vanities or double-sink configurations
The choice of finish dictates the room's mood while offering varying levels of maintenance:
- Brushed Nickel: Highly durable, hides water spots and fingerprints, and blends seamlessly into traditional or transitional designs.
- Matte Black: Offers bold contrast in modern or farmhouse spaces; requires simple dusting to maintain its smooth appearance.
- Chrome: Highly reflective and classic, perfect for modern and polished aesthetic schemes, though it requires frequent wiping to stay free of water marks.
- Brushed Gold / Brass: Adds warm luxury to contemporary vanities, offering high-end flair when paired with dark or neutral tile.
To keep your home looking current, keep an eye on evolving design shifts. Avoiding 7 Outdated Lighting Trends to Avoid in 2026 Renos—such as exposed harsh yellow Edison bulbs or oversized ornate scrollwork—ensures your new vanity light remains stylish for years to come. Modern designs favor clean linear silhouettes, warm metallic tones, and frosted or clear glass shades that diffuse illumination evenly.
Choosing the Right Size and Style for Your Bathroom Lighting Fixture Upgrade
Proportion is the golden rule of vanity light selection. As a rule of thumb, an overhead vanity light fixture should measure approximately 75% of the total width of the mirror beneath it. It should never extend beyond the outer edges of the mirror or vanity cabinet, as overhanging lights disrupt visual alignment and create uneven illumination.
Placement height is equally critical. Overhead vanity fixtures perform best when mounted roughly 75 to 80 inches off the finished floor, positioned centered 2 to 3 inches above the top frame of the mirror. This placement allows light to wash down across the face without casting heavy downward shadows under the eyes and chin.
Matching fixture styles with your existing bathroom decor creates a cohesive environment:
- Modern & Contemporary: Clean horizontal light bars, matte black or gold frames, integrated LEDs, and minimal acrylic or frosted glass diffusers.
- Farmhouse & Industrial: Fixtures featuring dark metal backplates, clear glass jar shades, and decorative vintage-style LED bulbs.
- Traditional & Transitional: Curved gooseneck arms, brushed nickel or polished chrome backplates, and bell-shaped opal glass shades.
If you are planning a broader renovation alongside your lighting update in the Lehigh Valley area, coordinating fixture finishes with updated plumbing hardware is an effortless way to elevate the space. Explore our full range of custom options through our Bathroom Remodeling Bethlehem services.
Integrated LED vs Replaceable Bulb Vanity Fixtures
One of the largest decisions during a bathroom lighting fixture upgrade is deciding between an integrated LED unit and a traditional fixture with replaceable sockets.
Integrated LED fixtures feature built-in light diodes directly attached to the circuit board. Fixtures like the Lufe Square 24 Bath - 700BCLUFS24 | Visual Comfort showcase how slim and modern integrated lights can be. Because they do not rely on standard light sockets, integrated fixtures offer sleek, ultra-thin profiles, ADA-compliant depths (extending less than 4 inches from the wall), and impressive energy efficiency—often drawing under 24 watts while outputting over 2,000 lumens.
Key benefits of modern integrated LED vanity lights include:
Selectable Color Temperature (5CCT): Many current fixtures include an internal dip switch allowing you to select between 2700K, 3000K, 3500K, 4000K, and 5000K during installation.
High Color Accuracy: Premium LEDs feature a Color Rendering Index (CRI) of 90 or higher, ensuring realistic skin tones during grooming routines.
Long Lifespan: Rated for up to 50,000 operational hours, eliminating bulb replacements for years.
Conversely, traditional fixtures with medium base (E26) or candelabra base (E12) sockets offer simple bulb replacement flexibility. If an LED bulb fails in a traditional fixture, you simply thread in a new one rather than replacing the entire light housing.
Step-by-Step Guide to Executing a Bathroom Lighting Fixture Upgrade
Replacing an old vanity fixture with a modern light can be accomplished in a few structured steps. Always prioritize safety when working near electrical components.
Budget-Friendly DIY Methods for a Bathroom Lighting Fixture Upgrade
If you want to update your bathroom on a tight budget without opening walls or rewiring, cosmetic refacing offers a fast alternative:
- Refinishing Metal Bases: Outdated brass Hollywood light strips or tarnished chrome bases can be removed, sanded lightly, primed with an oil-based primer, and sprayed with high-durability matte black or brushed metal spray paint.
- Swapping Glass Shades: Replacing yellowed, floral, or heavy frosted glass shades with modern clear cylinder glass shades instantly modernizes existing fixture arms.
- Upgrading Bulbs: Replacing old incandescent bulbs with high-CRI, dimmable globe-style LED bulbs improves light quality immediately.
Professional Fixture Installation and Wiring Safety
When executing a full replacement, follow these step-by-step instructions:
Shut Off Main Power: Locate your home's breaker panel and shut off the circuit supplying power to the bathroom light. Verify the power is off using a reliable non-contact voltage tester at the light switch and electrical box.
Remove the Old Fixture: Unscrew shade retaining rings, remove glass shades, and back out the mounting screws holding the fixture baseplate to the wall bracket. Carefully pull the fixture away to expose the wiring.
Disconnect Wires: Unscrew the wire nuts connecting the live (black), neutral (white), and ground (bare copper or green) wires. Remove the old mounting bracket from the junction box.
Install the New Mounting Bracket: Secure the new universal mounting plate to the electrical junction box using the provided screws. Ensure the bracket is level.
Wire the New Fixture:
- Connect the bare copper or green fixture ground wire to the junction box ground wire using a wire nut (and wrap it around the bracket's grounding screw).
- Twist the white neutral wire from the fixture to the white neutral house wire.
- Twist the black hot wire from the fixture to the black hot house wire.
- Cap each connection firmly with wire nuts and wrap securely with electrical tape.
Mount and Seal: Align the fixture canopy over the bracket studs, tighten retaining cap nuts, install glass shades or light covers, and restore power at the main circuit panel.
When selecting lights near showers, tubs, or humid vanity zones, ensure the unit carries a cETLus or UL Damp Location rating (or an IP44 moisture resistance rating). For homeowners considering wider accessibility enhancements, consult our guide on Bathroom Accessibility Modifications Pennsylvania to ensure safety code compliance across your space.
Optimizing Bathroom Task Lighting for Grooming and Accessibility
Achieving clean, glare-free task lighting requires strategic light placement. Relying solely on a single overhead ceiling fixture or central vanity light often casts harsh downward shadows under your eyes, nose, and chin, making shaving or applying makeup frustrating.
The ideal arrangement pairs a linear overhead vanity light with wall sconces mounted at eye level on either side of the mirror.
- Mounting Side Sconces: Position sconces 60 to 65 inches off the floor, spaced 28 to 36 inches apart on either side of the mirror. This side-by-side illumination illuminates both sides of the face evenly, eliminating shadows.
- Color Temperature Selection: For precise task lighting, set your fixture's color temperature between 3000K (Warm White) and 4000K (Cool/Natural Daylight). A rating of 3500K delivers a clean balance that mimics natural morning daylight.
- Aging-in-Place & Night Safety: High-contrast, glare-free lighting is essential for long-term accessibility. Incorporating low-voltage motion-sensor toe-kick lights under vanity cabinets provides soft, automatic floor illumination upon entry at night without forcing you to flip bright overhead switches.
For more layout ideas on accessible, future-proof spaces, read our comprehensive overview of Barrier-Free Bathroom Design.
Frequently Asked Questions About Bathroom Lighting Upgrades
How high above the mirror should a vanity light fixture be installed?
Overhead vanity lights should generally be mounted between 75 and 80 inches above the finished floor, centered approximately 2 to 3 inches above the top frame of the mirror. If your vanity mirror is particularly tall, ensure the fixture sits far enough above the frame to allow even light diffusion across the room without resting directly on the glass edge.
What color temperature (Kelvin) is best for applying makeup and shaving?
A color temperature range of 3000K to 4000K is ideal for daily grooming tasks. Lighting in the 3500K range mimics true outdoor sunlight without feeling harsh or overly blue. Pair this with a high Color Rendering Index (CRI) rating of 90+ to ensure cosmetics, skin tones, and clothing colors appear natural and accurate.
How many lights should my vanity fixture have based on mirror width?
Select your socket count based on vanity cabinet width:
- 1 to 2 Lights: Ideal for small vanities under 25 inches wide or powder room sinks.
- 3 Lights: Standard fit for vanities measuring 24 to 36 inches wide.
- 4 Lights: Designed for 36- to 48-inch single vanities.
- 5 to 6 Lights (or Dual Fixtures): Best suited for double vanities or large master bathroom counters wider than 48 inches.
Conclusion
Planning a bathroom lighting fixture upgrade transforms both the visual style and functional safety of your home. Whether you opt for a quick cosmetic refresh or replace older wall units with modern integrated LED bars and side sconces, balanced task lighting makes daily routines easier and more enjoyable.
At Sure-Fix Remodeling, we help homeowners across Eastern Pennsylvania and Western New Jersey design custom, accessible bathrooms tailored to their lifestyle. Visit our local showroom or explore our dedicated Bathroom Remodeling Services to start planning your perfect lighting and vanity renovation today.