Blog· September 10, 2026
How to Install a Bathroom Towel Warmer in 5 Easy-to-Follow Steps
Towel Warmer Types and Selection Guide
To complete a bathroom towel warmer install, follow these essential steps: mark your bracket and power locations using the manufacturer template, drill pilot holes into wall framing or secure heavy-duty wall anchors, fasten the mounting brackets, complete the GFCI-protected electrical or plug connections, and mount the rail firmly using set screws.
Selecting the right unit before starting your project makes the entire mounting and wiring workflow smooth. Heated towel rails rely on distinct heating mechanisms and connection methods designed for specific bathroom layouts, renovation phases, and power supplies.
Warmer Type
Heat Source
Power / Supply
Typical Install Time
Best Suited For
Electric Plug-In
Dry wire filament or internal fluid
Standard 120V GFCI outlet
15–30 minutes
Quick DIY retrofits, rental spaces
Electric Hardwired
Dry wire filament or internal fluid
Dedicated 120V branch circuit
1–2 hours (Electrician)
Full bathroom renovations, seamless wall finishes
Dual-Connection
Dry wire filament or internal fluid
Convertible: Plug-in or Hardwire
30–90 minutes
Flexible setups, phased remodels
Hydronic
Recirculating hot water / steam
Closed-loop boiler or plumbing line
2–4 hours (Plumber)
Homes with existing radiator heating loops
Electric vs. Hydronic Towel Warmers
Electric towel warmers are the most popular choice for modern residential homes across Eastern Pennsylvania and Western New Jersey. These units operate using either dry internal wire filaments or sealed, fluid-filled heating chambers. Fluid-filled models contain a specialized, non-toxic heat transfer solution treated with anti-rust and anti-freeze additives. They hold thermal energy longer, offering steady warmth and acting as supplemental zone heating for chilly morning routines.
Hydronic towel warmers connect directly to your home’s closed-loop boiler or hydronic heating system. Instead of using electrical resistance elements, hot water circulates through the vertical tubes and horizontal bars to warm your linens. While hydronic rails provide efficient heat output when your central boiler is already running, they require professional plumbing integration to route supply lines, install isolation valves, and bleed trapped air. If your project includes converting an old, bulky cast-iron unit during a bathroom remodel tub to walk in shower, swapping to a sleek hydronic rail preserves your boiler connection while reclaiming valuable floor space.
Plug-In, Hardwired, and Dual-Connection Models
When choosing an electric unit, you will decide between three distinct electrical connection styles:
Plug-In Warmers: These units mount to the wall brackets and plug directly into an existing 120V GFCI-protected wall receptacle located within 6 feet (1.8 meters) of the unit. They require no in-wall wiring changes, making them the fastest DIY installation option.
Hardwired Warmers: Hardwired units conceal all electrical wiring inside the wall cavity through a dedicated electrical junction box and matching wall collar. This eliminates visible cords and creates an uncluttered, high-end look. As detailed in the WarmlyYours Infinity Towel Warmer Installation & Operation Manual, hardwired setups require direct wire routing to an approved electrical box securely mounted to framing studs.
Dual-Connection Warmers: Dual-connect designs offer ultimate installation versatility. You can use the supplied power cord to plug into a standard outlet immediately, then transition the unit into a concealed hardwired configuration later during a full wall remodel without buying a new fixture.
Wattage typically ranges from 100W to 450W. Smaller units (100W–150W) work well for drying hand towels and single bath sheets, while 300W to 450W models deliver faster heat recovery and supply supplemental warmth in larger master bathrooms.
Key Safety Codes and Placement Rules for a Bathroom Towel Warmer Install
Bathrooms present a unique combination of high humidity, moisture, and electricity. Adhering to the National Electrical Code (NEC) and local building standards prevents electrical shock, eliminates fire risks, and ensures long-term system performance.
Water Clearance and Mounting Height Standards
Safe placement balances ergonomic convenience with proper moisture clearance. Follow these strict layout dimensions:
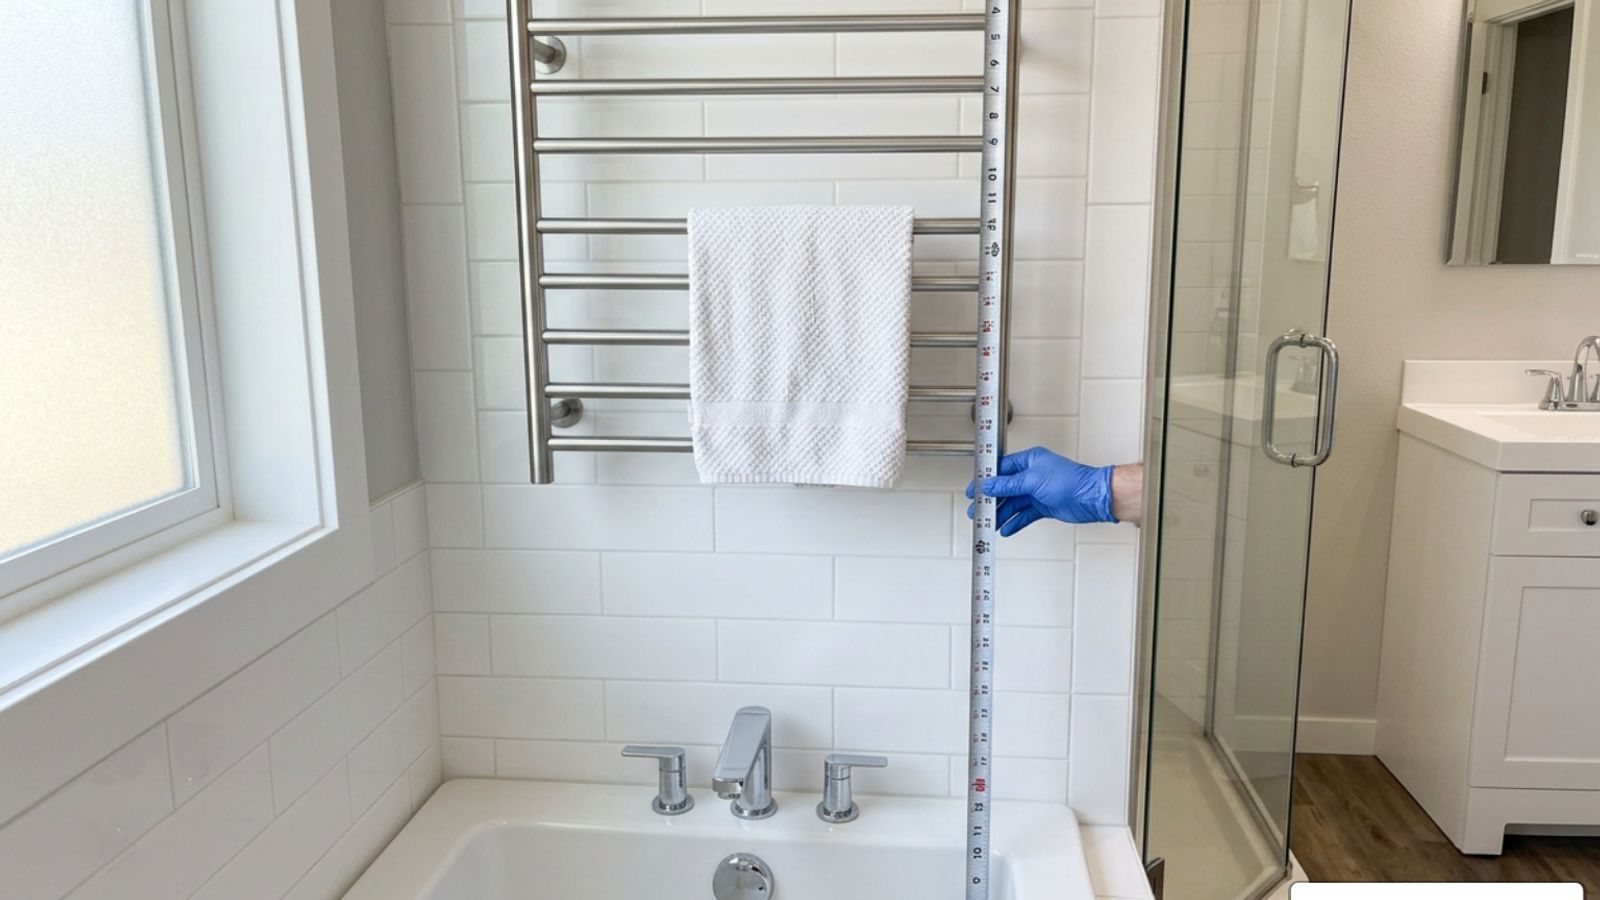
- Tub & Shower Clearance: The National Electrical Code requires fixed electric appliances to maintain a minimum clearance of 24 inches (600 mm) from the outside edge of any bathtub rim or shower enclosure threshold. Never install a standard 120V towel warmer directly inside a wet shower zone.
- Mounting Height: For optimal accessibility and heat distribution, mount the bottom rail of your towel warmer roughly 24 to 36 inches above the finished floor. If you are mounting a taller vertical ladder rail, aim for the top bar to sit between 48 and 60 inches from the floor so family members of varying heights can reach towels without straining.
- Wall Positioning: Whenever possible, choose an interior bathroom wall. Interior wall framing simplifies running new wire circuits and insulates the back of the warmer against cold exterior drafts. Ensure the unit has at least 2 to 3 inches of side and front clearance from swinging doors, vanity cabinets, and HVAC supply registers to maintain unrestricted air circulation.
GFCI Circuit and Grounding Requirements
Every electric towel warmer installed in a residential bathroom must be protected by a Ground Fault Circuit Interrupter (GFCI). This safety mechanism continuously monitors electrical current and cuts power in fractions of a second if a moisture-induced ground fault occurs.
For hardwired installations, the fixture should connect to a dedicated 15-amp branch circuit wired with standard 14 AWG copper conductors. Grounding is mandatory—the equipment ground wire must securely bond to the metal housing and the grounding terminal in the junction box. If you are already scheduling electrical upgrades like a bathroom lighting fixture upgrade, running the dedicated line for your heated towel rack at the same time minimizes disruption and keeps labor efficient.
How to Install a Towel Warmer in 5 Steps
Installing a wall-mounted electric towel warmer requires careful planning, accurate measuring, and secure anchoring.
Tools and Preparation for a Bathroom Towel Warmer Install
Before drilling into your bathroom tile or drywall, gather the appropriate tools and ensure your work area is safe:
- Stud finder and digital multi-surface scanner
- 24-inch or 48-inch spirit level
- Measuring tape and marking pencil
- Variable-speed drill with masonry/tile carbide bits and standard wood bits
- Phillips and flathead screwdrivers
- Hex key/Allen wrench set (usually supplied with the warmer)
- Non-contact voltage tester
- Wire strippers and UL-listed wire nuts (for hardwired models)
- Drywall toggle anchors (for non-stud mounting points)
Always shut off power to the bathroom circuit at the main electrical service panel before beginning any electrical preparation. Verify the circuit is completely de-energized using your non-contact voltage tester.
Step-by-Step Mounting and Wiring Instructions
Step 1: Mark Mounting Points with the Template
Unbox your towel rail and locate the manufacturer’s paper mounting template. Tape the template to the selected wall location using painter's tape. Use a 24-inch spirit level across the template lines to verify horizontal and vertical alignment. Use a pencil or center punch to mark the exact bracket anchor points and the power feed collar location onto the wall surface.
Step 2: Locate Studs and Drill Pilot Holes
Use your stud finder to determine if wall studs align with your mounting points. For long-term structural security, at least two mounting brackets should anchor directly into solid wood wall studs.
- For Wood Studs: Drill 1/8-inch pilot holes directly into the center of the framing members.
- For Tile or Hollow Drywall: Use a carbide-tipped masonry drill bit at low speed to drill through tile without cracking. Insert heavy-duty drywall anchors or toggle bolts rated for at least 50 lbs each.
Step 3: Secure Wall Brackets
Fasten the mounting bracket bases to the wall using the provided mounting screws. Do not overtighten the screws initially; verify each bracket base remains plumb and level, then torque the fasteners down firmly.
Step 4: Make Electrical Connections
Depending on your unit’s connection style:
- Plug-In Setup: Route the factory power cord neatly down the wall toward your GFCI outlet. Ensure the cord does not pull tight or touch the heated horizontal rails.
- Hardwired Setup: Thread the unit’s power leads through the mounting tube and cover plate. Align the electrical collar over the single-gang junction box as outlined in the VASTO TOWEL WARMER installation guide. Connect the black (hot) lead to the circuit hot wire, the white (neutral) lead to the neutral wire, and bond the green/bare copper ground wire to the grounding screw. Secure all connections with wire nuts and tuck the wires safely inside the junction box.
Step 5: Mount and Secure the Rail
Slide the towel warmer frame arms over the wall-mounted bracket posts. Insert the hex set screws on the underside of each bracket arm. Tighten the set screws evenly using your Allen wrench to pull the fixture tight against the wall. Restore power at the main breaker, switch the unit on using the integrated power switch, and check for even warmth across all horizontal bars within 15 to 20 minutes.
Post-Installation Maintenance, Operation, and Troubleshooting
Modern electric towel warmers require minimal daily maintenance, but following proper operational guidelines ensures maximum energy efficiency and safety.
Best Practices for Towel Loading and Temperature Control
Heated towel warmers are engineered with internal safety limiters. Most units incorporate a thermal cutoff switch that automatically cycles heating elements off if internal temperatures reach 167°F (75°C) and reactivates once temperatures cool to 149°F (65°C), maintaining safe surface temperatures between 120°F and 140°F.
To optimize performance:
- Observe the Two-Towel Rule: Limit the warmer to a maximum of two folded bath sheets at a time. Stacking too many heavy towels traps excessive heat, triggers thermal shutoffs, and restricts airflow.
- Hang Flat for Drying: Drape towels flat across multiple horizontal rungs rather than bunching them together. Spreading the fabric accelerates drying time from the standard 6–8 hours down to 1–2 hours, dramatically reducing mold, mildew, and bacteria growth on damp towels.
- Integrate a Timer: Pair your hardwired warmer with an in-wall 7-day programmable digital timer or smart switch. Programming the warmer to run for 2 hours during morning and evening routines keeps linens toasty while saving energy throughout the day. Review our bathroom remodeling complete guide 2026 for more insights on integrating smart energy controls into modern bathroom renovations.
- Surface Cleaning: Wipe down the chrome, brushed nickel, or matte black bars periodically with a soft microfiber cloth dampened with warm water. Never clean heated rails with abrasive pads, scouring powders, bleach, or harsh chemical solvents that can degrade protective finish coatings.
Avoiding Common Mistakes During a Bathroom Towel Warmer Install
Avoid these common installation errors to keep your bathroom safe and code-compliant:
- Using Extension Cords: Plug-in models must connect directly into a permanent wall receptacle. Running power through an extension cord in a damp bathroom environment creates an immediate fire and tripping hazard that violates electrical safety codes.
- Mounting Without Framing Backing: Relying solely on basic plastic drywall anchors across all four mounting corners leads to loose brackets over time as wet towels add dynamic weight. Always anchor into at least one stud or install solid blocking during the rough-in stage.
- Upside-Down Orientation: Towel warmers have dedicated power entry legs and internal fluid channels. Installing a unit upside-down disrupts fluid convection, causes uneven heating, and voids manufacturer warranties.
- Ignoring Splash Clearances: Installing an electric rail closer than 24 inches to an open shower pan exposes the internal wiring collar to direct water spray.
Frequently Asked Questions About Towel Warmer Installation
Can I install an electric towel warmer inside a shower enclosure?
Standard 120V electric towel warmers cannot be installed inside a shower enclosure or bathtub area (Zone 0 and Zone 1). Direct water spray can penetrate electrical collars and create severe shock hazards. The only exception is specialized, ultra-low-voltage 12V DC heated rails engineered with an IPX5 or higher waterproof ingress rating, paired with a remotely located step-down transformer positioned safely outside the wet zone.
How much electricity does a heated towel rack use?
Residential electric towel warmers consume very little power, typically drawing between 100 and 450 watts—similar to running a few standard incandescent light bulbs. If you operate a typical 150-watt unit for 4 hours a day with a programmable timer, daily power consumption is only 0.6 kilowatt-hours (kWh), translating to just a few dollars per month on your electric bill.
Do I need a licensed electrician to install a hardwired towel warmer?
While mounting the physical wall brackets is an approachable DIY task, making hardwired electrical connections inside a bathroom wall requires a licensed electrician in most jurisdictions. An electrician ensures proper wire gauge sizing (14 AWG on a 15A breaker), verifies GFCI circuit protection, installs the rough-in box to framing studs, and ensures compliance with local NEC building codes.
Conclusion
A heated towel warmer brings daily comfort, faster linen drying, and a clean modern aesthetic to any bathroom. Whether you choose a simple plug-in unit or a seamlessly integrated hardwired rail, adhering to the 24-inch water clearance guideline, securing your brackets into wall framing, and verifying GFCI protection will guarantee years of dependable performance.
If you are planning a complete master bath renovation, aging-in-place improvements, or electrical upgrades in Eastern Pennsylvania or Western New Jersey, partner with experienced professionals. Contact Sure-Fix Remodeling today to explore our services bathroom design solutions and schedule your consultation in our local showroom.