Blog· August 25, 2026
How to Install Flooring Without Removing Skirting in Simple Steps
Practical Methods for Fitting Laminate Flooring Without Removing Skirting
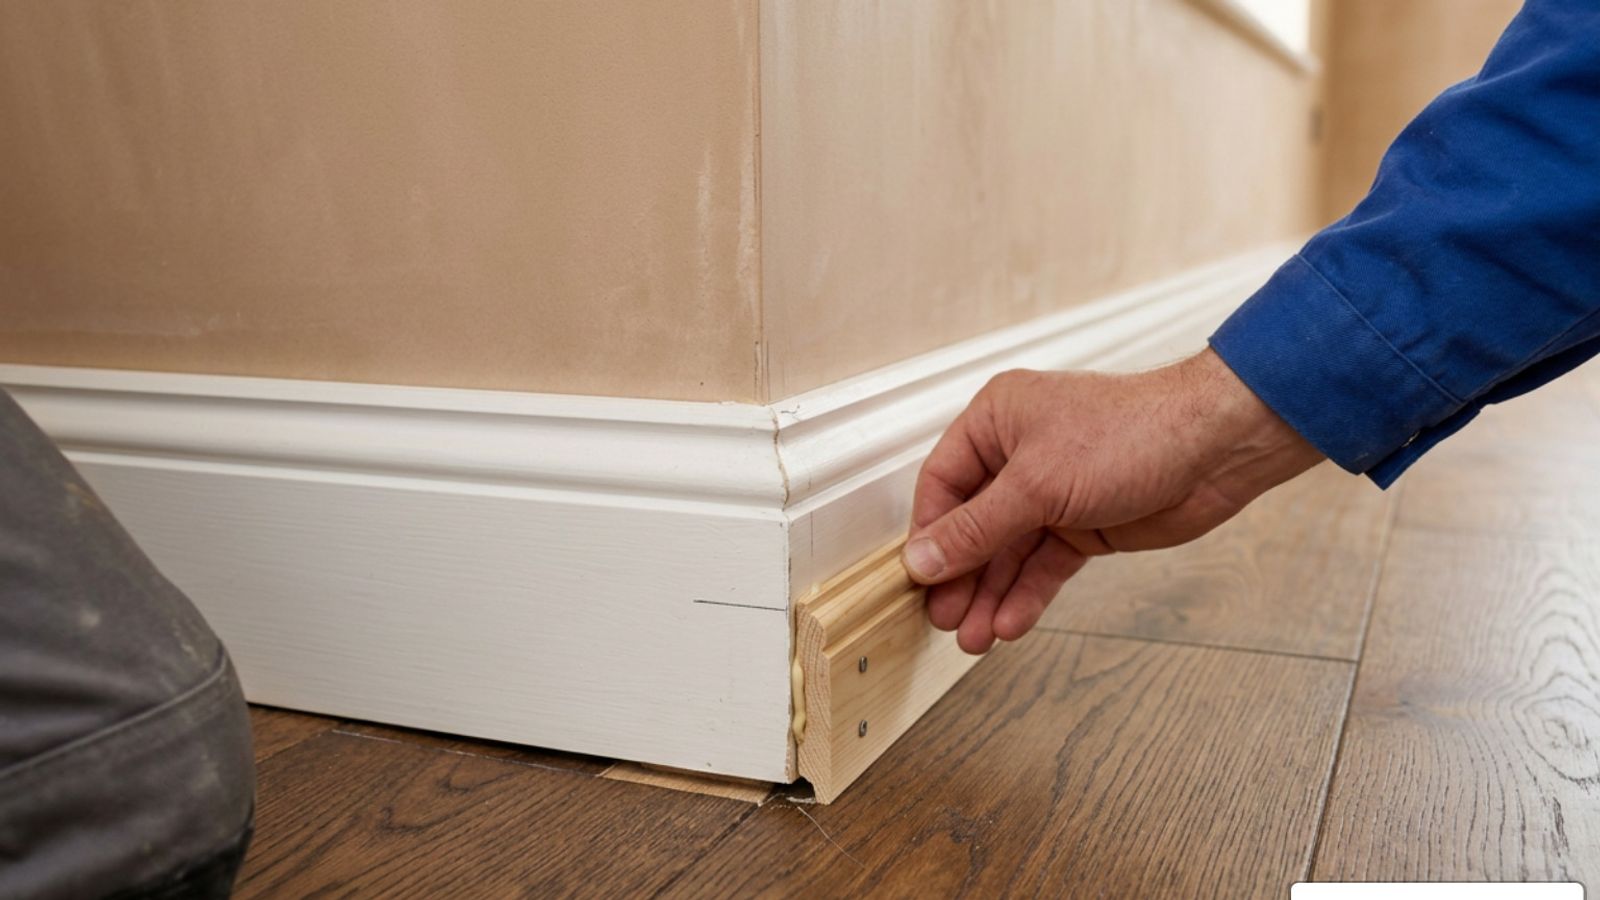
Fitting laminate flooring without removing skirting can be achieved through two proven methods: concealing the expansion gap with secondary perimeter moulding (like scotia beading) or undercutting the existing baseboards in place so the planks slide underneath. Installing scotia trim is the fastest, non-invasive option for DIYers, while in-place undercutting delivers a seamless built-in finish. Both techniques maintain the mandatory expansion gap around the room while protecting vintage plaster, paint, and original millwork across homes in the Lehigh Valley.
Method
Best For
Key Advantages
Potential Challenges
Scotia / Trim Moulding
DIY projects, quick room turnarounds, budget-friendly updates
Fast installation, zero risk of hitting hidden cables/pipes, easy to replace
Adds a visible secondary step profile against the baseboard
In-Place Undercutting
High-end visual finish, preserving vintage baseboard height
Clean "built-in" appearance without extra floor beading
Blade-intensive, requires depth control, risks hidden wires/pipes
Method 1: Concealing Perimeter Gaps with Scotia Beading
The most reliable, non-invasive technique relies on secondary trims such as scotia beading, quadrant moulding, or low-profile shoe moulding.
Scotia features a concave, curved profile that nestles neatly into the right angle formed by your wall trim and the new planks. Quadrant moulding presents a convex curve, while base shoe offers a slimmer vertical profile.
When installing perimeter trim:
- Color Coordination: Match the trim finish directly to your plank pattern for an expansive floor appearance, or paint it to match the skirting for a classic baseboard look.
- Miter Joints: Cut all internal and external corners at clean 45-degree angles using a miter box and fine-tooth saw to prevent unsightly corner seams.
- Fastening Rules: Use an 18-gauge brad nailer or a dedicated gap adhesive to attach the trim strictly to the skirting board. Nailing into the laminate floor will pin the floating system down, leading to peaked joints or seasonal buckling.
Method 2: Undercutting Skirting Boards In-Place
If you dislike the look of surface beading, you can create clearance by trimming the lower edge of the existing baseboard. Adopting established retrofit undercutting methods allows you to trim the wood in place without disturbing the wall above it.
Height Guide Setup: Place a scrap off-cut of your chosen laminate on top of your underlayment against the baseboard. This combined stack acts as your physical height guide.
Cutting Tool Selection: Lay an oscillating multi-tool fitted with a wide flush-cut wood blade flat on top of the scrap guide. Specialized biscuit jointers or dedicated jamb saws equipped with adjustable guide plates also yield quick, consistent cuts along long runs.
Depth and Safety Gauging: Never cut blindly into wall cavities. Use a multi-detector to confirm there are no electrical cables or shallow plumbing lines notched behind the baseboards. Cut only deep enough (typically 10 mm to 12 mm) to accept the plank edge while leaving an expansion gap behind it.
Clearing the Waste: After making the horizontal relief cut, use a small pry bar or wood chisel to pop the severed bottom strip free from any retaining brads.
Step-by-Step Installation Process for Floating Floors
A successful floating floor depends heavily on thorough preparation. Modern high-density fiberboard (HDF) cores are moisture-sensitive and expand or contract as seasonal humidity shifts throughout the year.
Preparing the Subfloor and Acclimatizing Materials
Acclimatization: Bring your boxed laminate into the target room at least 48 hours prior to installation. Stack boxes flat, away from direct sunlight or exterior walls, allowing the planks to adjust to indoor temperature and relative humidity.
Subfloor Leveling: Inspect the subfloor for uneven spots. Subfloor variations must not exceed 2 mm over a 1-meter span. Sand down high ridges on timber subfloors or apply a self-leveling compound over uneven concrete. Remove all old carpet staples and sweep the surface completely clean.
Moisture Protection: If you are working over concrete slabs, roll out an underlayment that incorporates a built-in damp-proof membrane (DPM). Overlap seam edges by at least 100 mm to 200 mm and seal the joints thoroughly with moisture-resistant vapor tape. A resilient foam or fiberboard underlay provides essential acoustic dampening and thermal insulation.
Laying the Field and Maintaining Spacing
Following proven guidelines for click lock flooring installation keeps the field flat and stable:
- Establishing Spacing: Place 8 mm to 10 mm plastic spacers between the plank edges and the skirting boards around the entire perimeter.
- Row Orientation: Whenever possible, run boards parallel to incoming natural light or along the longest continuous wall to create a spacious visual flow.
- Joint Staggering: Maintain a minimum offset of 30 cm to 35 cm between end joints in adjacent rows. This structural overlap ensures the floor behaves as an integrated, unified sheet.
- Engaging Planks: Modern click-and-lock laminate flooring systems utilize precision-milled tongues and grooves. Angle each plank at roughly 20 to 30 degrees, insert the tongue into the receiving groove, and drop it flat to lock it into place.
Detailed Steps for Fitting Laminate Flooring Without Removing Skirting on Final Rows
The greatest technical challenge when working with intact baseboards happens at the final wall, where vertical wall clearance prevents you from tilting the plank upward to click it home.
Modify the Locking Tongue: Using a sharp utility knife or a fine wood chisel, shave off the raised locking ridge along the groove lip of the receiving board. This allows the final plank to slide in horizontally rather than dropping in at an angle.
Apply Joint Adhesive: Run a thin, continuous bead of PVA tongue-and-groove wood glue along the modified joint channel to ensure a secure permanent bond.
Position with a Pull Bar: Lay the final ripped plank into position. Slip the drop-hook end of a heavy-duty steel pull bar over the outer edge of the plank against the wall.
Leverage the Joint Closed: Tap the striking anvil of the pull bar with a dead-blow mallet to draw the plank horizontally into the glued groove until the joint seam closes flush.
Secure Spacers: Immediately slide perimeter spacers between the wall and the final plank to prevent the board from drifting while the glue sets.
Managing Doorways, Radiators, and Transition Thresholds
Clean detailing around door linings and radiator pipes separates a rushed DIY job from high-quality craftsmanship. These transition points are prime spots where floating floors can get pinched if cut incorrectly.
- Door Jambs and Architraves: Never try to notch laminate planks around intricate, multi-layered door mouldings. Instead, lay an off-cut piece of flooring and underlay against the door casing. Rest a fine-toothed flush-cut pull saw flat on top and saw horizontally through the door jamb and architrave. Vacuum the sawdust and slide the flooring plank smoothly underneath for a professional look.
- Threshold Transitions: Floating laminate must never run continuously across unbroken spans exceeding 10 to 12 meters without an expansion break. At every doorway, install a matching T-moulding or multi-purpose reducer bar to accommodate individual room movement, following step-by-step floating floor instructions.
Cutting Planks Around Radiator Pipes
Plumbing pipes that penetrate the floor require precision layout to preserve thermal expansion room while maintaining a tidy appearance:
Measure the exact center point of the pipe relative to the adjacent wall and the previous plank row. Mark these coordinates on the new plank.
Drill a hole using a spade bit or hole saw that is 16 mm to 20 mm larger in diameter than the outer pipe width (providing an unobstructed 8 mm to 10 mm perimeter gap).
Cut two 45-degree relief angles outward from the outer edge of the drilled hole to the back edge of the plank, creating a removable wedge piece.
Slide the main board into place around the front of the pipe. Apply a dab of wood glue to the edges of the cut wedge, insert it behind the pipe, and align the wood grain.
Conceal the expansion clearance around the pipe using a split-ring radiator pipe collar that snaps flush around the pipe base.
Key Mistakes to Avoid When Fitting Laminate Flooring Without Removing Skirting
Prevent common installation pitfalls with thoughtful preparation and proper flooring installation planning:
- Pinning the Floor: Fastening scotia moulding or transition profiles into the floor planks instead of the vertical baseboard prevents natural expansion, causing the center of the room to peak and lift.
- Neglecting Acclimatization: Installing cold or humid planks straight from an unheated vehicle will lead to shrinking joints or bowed edges once the home's heating or cooling system runs.
- Skipping Undercut Depth Checks: Cutting skirting boards too shallowly will bind the edges of the plank, eliminating the expansion space and straining click-lock joints.
- Ignoring Subfloor Dips: Laying laminate over hollow spots or ridges greater than 2 mm creates noticeable bounce beneath foot traffic, eventually snapping the click-lock mechanisms.
Frequently Asked Questions About Laying Laminate with Intact Skirting
Can you slide click-lock laminate directly under skirting without removing it?
Yes, but only if the baseboard is undercut to the correct height and depth. Because modern click mechanisms require an angle to engage, you must either modify the locking tongues (as detailed in our final row instructions) to allow horizontal insertion or ensure enough clearance exists behind the cut to shift the floor assembly as you work.
Why is an expansion gap required if skirting boards stay in place?
Laminate flooring is composed of compressed wood fibers that expand and contract during seasonal temperature and humidity changes. Without an unobstructed 8 mm to 10 mm gap around the perimeter, expanding boards will press against the baseboards or wall studs, forcing plank edges to peak, crack, or separate.
Should scotia trim be fixed to the floor or the skirting board?
Always fix scotia trim, quadrant moulding, or shoe moulding directly to the skirting board. Use 18-gauge headless brad nails driven horizontally into the baseboard, or use high-grab construction adhesive along the back of the trim. Keep the bottom edge free from glue so the floating floor can slide smoothly underneath.
Conclusion
Leaving your existing baseboards in place saves significant project time, eliminates costly wall and plaster repairs, and protects historic woodwork. By using precise scotia trim or carefully undercutting the bottom edge of the skirting, you can achieve a durable, beautiful floor that retains complete freedom to expand naturally through every season.
If your renovation involves complex room layouts, tricky transitions, or historic trim that requires precision joinery, our team is ready to help. Reach out to schedule a consultation with Sure-Fix Remodeling's flooring services to transform your home with quality craftsmanship.